
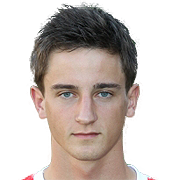
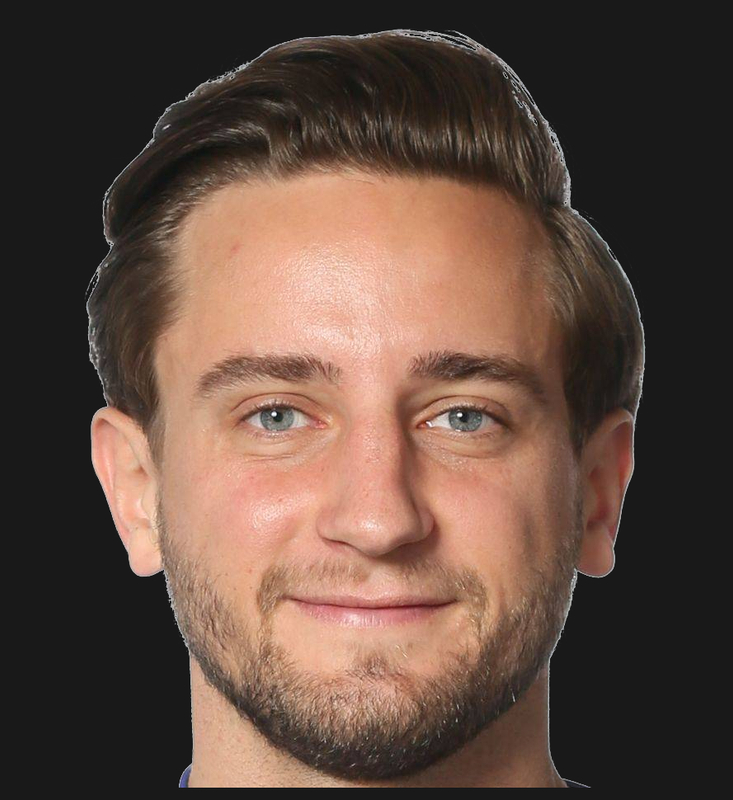
Konstantin Fring - Submissions - Cut Out Player Faces Megapack
91002419 Background and Stadium Packs

Submitted
22 May 2023 20:53:10
Timeline


This image is a response to
#244049

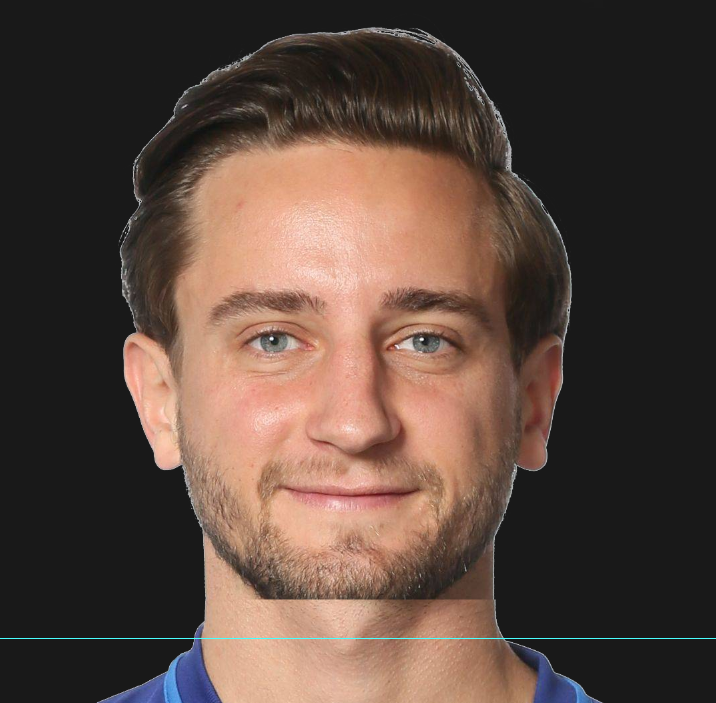
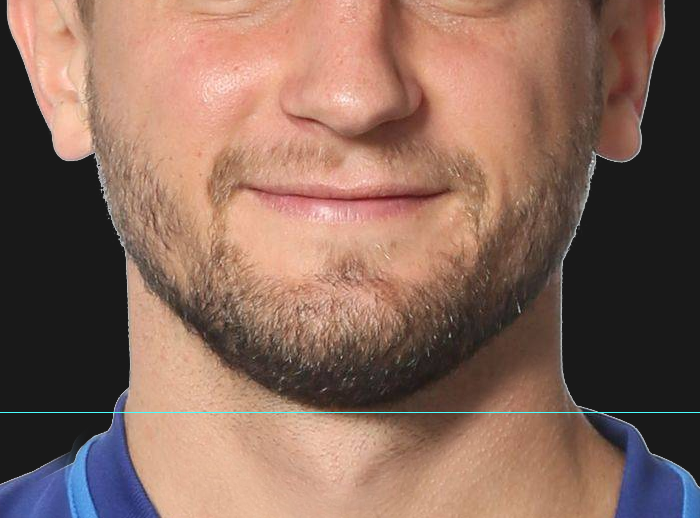
To avoid to leave to much space below chin.
I can't deal with copying and moving the colar

Is there any part of that method you need help with?
Is there any part of that method you need help with?
i've watched the video tut you've posted multiple times but can't do it myself.
I' m messing it up,
Maybe i'm selecting to much flesh when i move it upwards,it looks so unnatural to me.
i've watched the video tut you've posted multiple times but can't do it myself.
I' m messing it up,
Maybe i'm selecting to much flesh when i move it upwards,it looks so unnatural to me.
It can take a bit of practice to become comfortable with it, I felt that way at first as well.
Here's a slight variation on the technique, perhaps this is easier to follow? These instructions are for Photoshop so might be different in other software. Sorry if there's a lot of steps, it's a bit complex and I'm not the best at explaining things! If you prefer not to use the whole of this technique, you can just use the first few steps which will have the same effect as the other method, but with the added benefit of layer masks being adjustable so you won't have to redo any selections for the neck/collar.
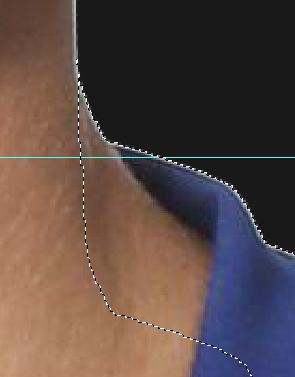
Once you've made your cutout (this is just a very rough cutout for the example), use the layer mask tool for separating the cutout from the background.

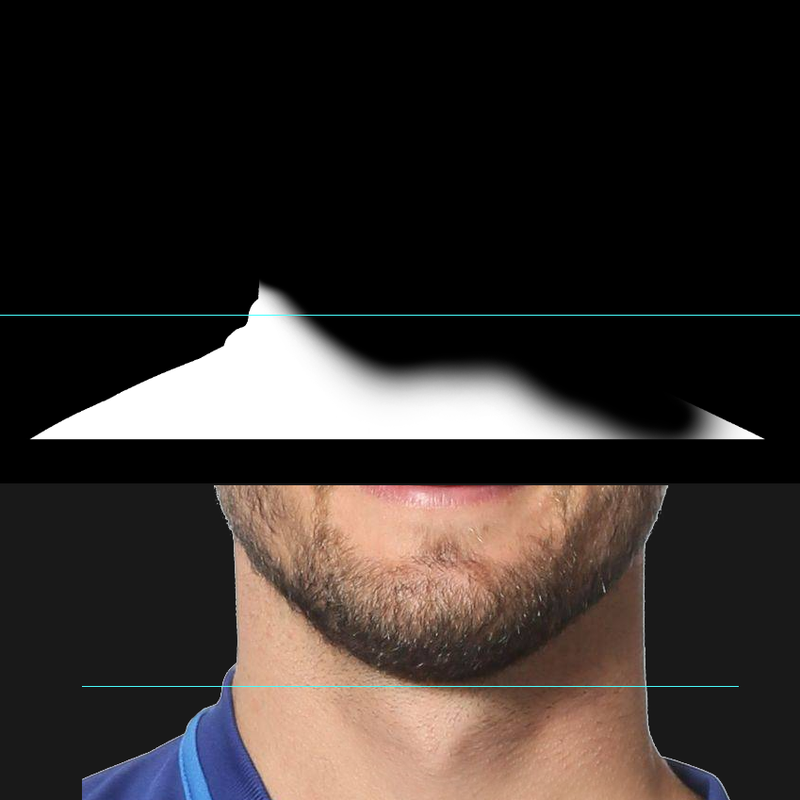
Then, duplicate the cutout layer, and with the rectangular marquee tool, with the layer mask selected, click and drag to select the face area (anything above the neck) and fill it with black to mask it out.

Then, nudge the duplicated layer up until the collar is roughly in line with the chin. You can use a Guide as a reference to make it easier if you want.
As you can see, it's not aligned with the neck on one side, but we can fix that. Nudge the layer sideways if necessary, to line the join up with the neck, and then because it's not aligned on the right side of the image, we'll duplicate the layer (and hide it for now) for after this step. Using the brush tool, with these settings (brush size can be whatever you want), with a black brush and the layer mask selected, paint out basically everything but the collar and the skin around it so that there can be a smooth transition. Here's what my layer mask for the left-hand side collar looks like, and the result of that.

Next, hide the left-hand side collar layer for now, and unhide the layer we'll use for the right-hand side collar. In this case it needs aligning better, so I'll nudge it up a few pixels and left a few pixels so the neck lines up properly and a bit of the collar is showing. Then, repeat the step above, using the brush tool on the layer mask to remove the parts we don't want, but be careful not to erase the parts of the collar that aren't overlapping the neck of the base cutout layer (the selected area here) as that needs to be 100% opaque or it will be partly transparent.

After masking out the right-hand collar, this is the result so far.
The lighting on the skin around the right-hand collar is a bit too bright and looks unnatural, so I'll use a brightness adjustment layer (with a clipping mask to just the right-hand collar layer) to reduce the brightness a little bit for that layer.

Then, I'll make the transition a little bit smoother: Ctrl+Click the layer mask for the right-hand collar and then Ctrl+Alt+Click the layer mask for the base cutout. This masks a selection of just the parts of the right-hand collar's layer mask that aren't overlapping the base cutout. Then, Ctrl+Alt+I to invert that selection. Now the selection avoids those parts so we don't brush over them by accident and reduce their trasnparency.
Then, using the brush tool on a low transparency (around 10% or 20%) with a large brush size, painting on the layer mask makes the transition more gradual and smoother. One word of caution with this though, is that you might need to brush over the "seam" where the two layers edges are, and paint over it in the layer mask with a white brush at a small size to increase the opacity to avoid any glare (the white edges) from the base cutout layer showing through. Before vs After:

And that's basically it, now you have the collar moved up with a gradual transition:
Then, duplicate the cutout layer, and with the rectangular marquee tool, with the layer mask selected, click and drag to select the face area (anything above the neck) and fill it with black to mask it out.
Then, nudge the duplicated layer up until the collar is roughly in line with the chin. You can use a Guide as a reference to make it easier if you want.
As you can see, it's not aligned with the neck on one side, but we can fix that. Nudge the layer sideways if necessary, to line the join up with the neck, and then because it's not aligned on the right side of the image, we'll duplicate the layer (and hide it for now) for after this step. Using the brush tool, with these settings (brush size can be whatever you want), with a black brush and the layer mask selected, paint out basically everything but the collar and the skin around it so that there can be a smooth transition. Here's what my layer mask for the left-hand side collar looks like, and the result of that.
Next, hide the left-hand side collar layer for now, and unhide the layer we'll use for the right-hand side collar. In this case it needs aligning better, so I'll nudge it up a few pixels and left a few pixels so the neck lines up properly and a bit of the collar is showing. Then, repeat the step above, using the brush tool on the layer mask to remove the parts we don't want, but be careful not to erase the parts of the collar that aren't overlapping the neck of the base cutout layer (the selected area here) as that needs to be 100% opaque or it will be partly transparent.
After masking out the right-hand collar, this is the result so far.
The lighting on the skin around the right-hand collar is a bit too bright and looks unnatural, so I'll use a brightness adjustment layer (with a clipping mask to just the right-hand collar layer) to reduce the brightness a little bit for that layer.
Then, I'll make the transition a little bit smoother: Ctrl+Click the layer mask for the right-hand collar and then Ctrl+Alt+Click the layer mask for the base cutout. This masks a selection of just the parts of the right-hand collar's layer mask that aren't overlapping the base cutout. Then, Ctrl+Alt+I to invert that selection. Now the selection avoids those parts so we don't brush over them by accident and reduce their trasnparency.
Then, using the brush tool on a low transparency (around 10% or 20%) with a large brush size, painting on the layer mask makes the transition more gradual and smoother. One word of caution with this though, is that you might need to brush over the "seam" where the two layers edges are, and paint over it in the layer mask with a white brush at a small size to increase the opacity to avoid any glare (the white edges) from the base cutout layer showing through. Before vs After:
And that's basically it, now you have the collar moved up with a gradual transition:


This image is part of a pack:
Schott Mainz
Pending
by Armamaddon
on 05 May 2023 00:05:03
Completed
by mons
on 05 May 2023 05:13:16
I can't deal with copying and moving the colar