This guide will show you how to download and install Realistic Regen Player Faces (Newgan Faces) in Football Manager so that new young players have real photographs of players
How to download and install Realistic Regen Player Faces (Newgan Faces) in Football Manager
This guide is now out of date. Only use this guide if you have previously used the NewGan Manager to install Ultra Realistic AI Faces and are continuing the the same save with the same config files.
If you are starting a new save or installation use the updated guide using the FM.Z Tool
Step 1) Extract the Zip
Once you've downloaded the Newfan Faces Megapack you should have a .zip file somewhere on your computer called something like “newgan_faces.zip” (the name may change to include a version number in the future that's fine).
You'll need to extract this file which is very easy to do:
Apple: Unzip Newgan Faces Megapack on Mac
To unzip the Newgan Faces Megapack on a Mac you can simply double click it.
Windows: Unzip Newgan Faces Megapack on Windows
To unzip the Newgan Faces Megapack on Windows simply right click and click “Extract All”
Step 2) Move the folder
Once you've extracted the zip file you should have a folder called something like “Newgan Faces Megapack” you will need to move this to a special location where all your Football Manager Add Ons are stored.
Apple: Where to put the Newgan Faces Megapack on Mac
You will need to copy the folder to this location:
/Application Support/Sports Interactive/Football Manager 2022/graphics
You may find it difficult to find this exact location, to make it easier, use the following instructions:
a) Open Finder
b) Click “Go” from the menubar and select “Go to Folder” (alternatively press Shift+CMD+G)
c) Copy in the following: ~/Library/Application Support/Sports Interactive/
d) Open the “Football Manager 2022” folder
e) Open the “graphics” folder (or created it if it doesn't exist)
f) Move the "sortitoutsi Newgan Faces Megapack” into this folder
Windows: Where to put the Newgan Faces Megapack on Windows
Simply move the "sortitoutsi Newgan Faces Megapack” folder to the following location:
Documents/Sports Interactive/Football Manager 20XX/graphics
If you don't have a “graphics” folder simply create it 🙂
Step 3) Download and Install the NewGan Manager
Visit this page to download the NewGan Manager Tool. There is a version for both Windows and Mac.
When you download it you will be greeted by a .zip file. Follow the same steps as in Step (1) to unzip this file.
Your folder structure should look like this:
Windows
- filters
- is newgen search filter.fmf
- views
- SCRIPT FACES player search.fmf
- SCRIPT FACES shortlist.fmf
- SCRIPT FACES squad.fmf
- SCRIPT FACES staff.fmf
- windows
- NewGAN-Manager-1.3.1.msi
Mac
- filters
- is newgen search filter.fmf
- macOS
- NewGAN-Manager-1.3.1.dmg
- views
- SCRIPT FACES player search.fmf
- SCRIPT FACES shortlist.fmf
- SCRIPT FACES squad.fmf
- SCRIPT FACES staff.fmf
Double click on the following file:
Windows: NewGAN-Manager-Installer-Win/windows/NewGAN-Manager.msi
Mac: NewGAN-Manager-Installer-Mac/MacOS/NewGAN-Manager.dmg
This will then install the program on your computer.
Step 4) Open the NewGan Manager
Open the NewGan Manager application as you would any other program on your computer.
You may receive an error on Mac
“NewGAN-Manager.app”cannot be opened because the developer cannot be verified.”
To get around this simply go to Library > Applications find NewGAN Manager and click Right Click > Open and then select “Open”
When you open the tool you will see something like this:
Step 5) Where to put the “views” and “filters”
In order to use the tool you will need to generate an RTF File from the game.
In Step (3) you should have the following two folders “filters” and “views”
- filters
- is newgen search filter.fmf
- views
- SCRIPT FACES player search.fmf
- SCRIPT FACES shortlist.fmf
- SCRIPT FACES squad.fmf
- SCRIPT FACES staff.fmf
Move these two folders “filters” and “views” to the same location as you moved the faces in step (2).
Mac:
Application Support/Sports Interactive/Football Manager 20XX/filters
Application Support/Sports Interactive/Football Manager 20XX/views
Windows:
Documents/Sports Interactive/Football Manager 20XX/filters
Documents/Sports Interactive/Football Manager 20XX/views
Step 6) Generating an RTF File in Football Manager
Now follow these instructions very carefully:
- Now open Football Manager and load your saved game.
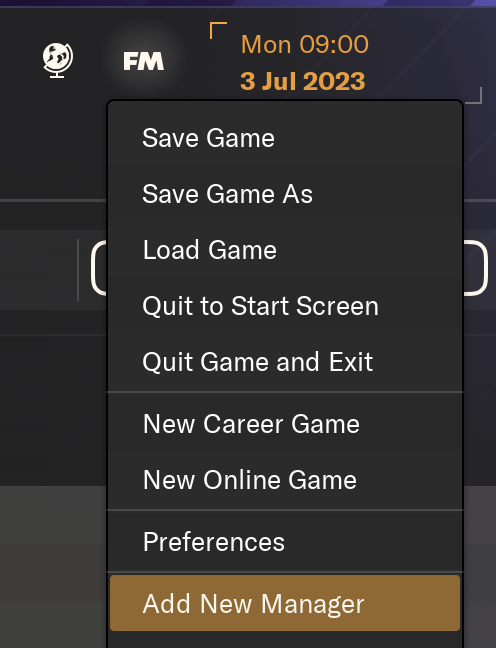
- Click the FM Icon > Add New Manager and add a new manager
- (The reason for this is because your manager can be limited by your clubs scouting network, unemployed managers can view all players)
- Now playing as the new manager click “Shortlist” on the left
- Then click “New Search” in the top right (It may also say “Edit Search”)
- Now in the bottom left click the ⚙️ settings cog icon > Manager Filters
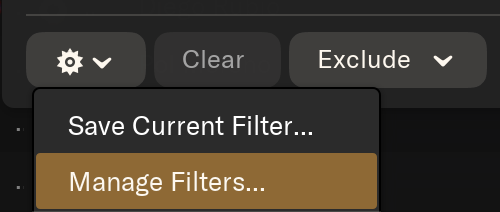
- Click “import” in the top right
- Now you should see a file called “is newgen search filter” select it and then click “load” in the bottom right
- If you don't see “is newgen search filter” then you've put the “filters” folder in the wrong place in the last step
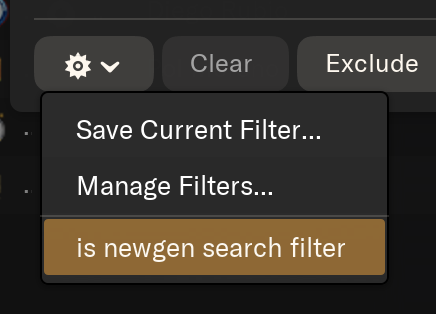
- Now back on the screen we just were click ⚙️ again and now “is newgen seach filter”
- A new filer will now popup that looks like this:
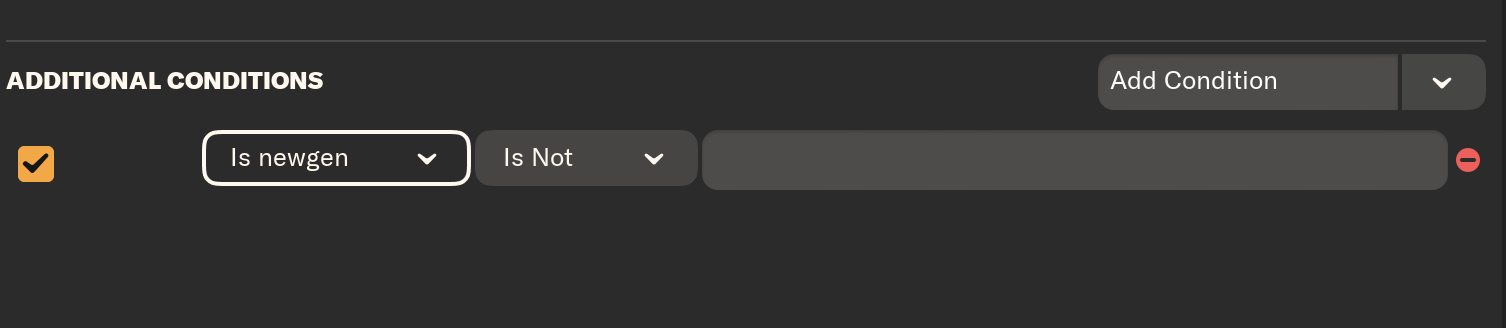
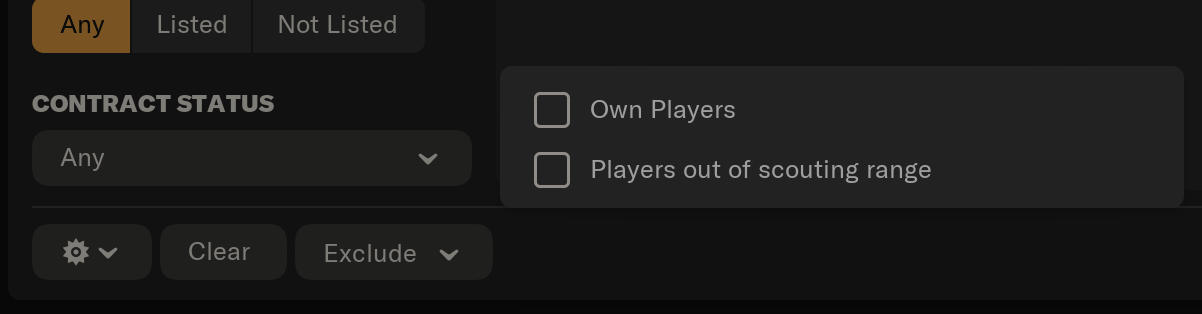
- Now make sure the search isn't excluding your own players by clicking “Exclude” and making sure “Own Players” is unchecked.
- Click “Ok” to search and you will see some search results.
- Warning: If you have too many results e.g. 10,000 + you may find the next few steps to be very slow or crash you can use other filters like age to make the number of results smaller.
- Now click the dropdown button that lets you customise the view (you may also be more familiar with right clicking the table headings)
- Then click on Custom > Import View
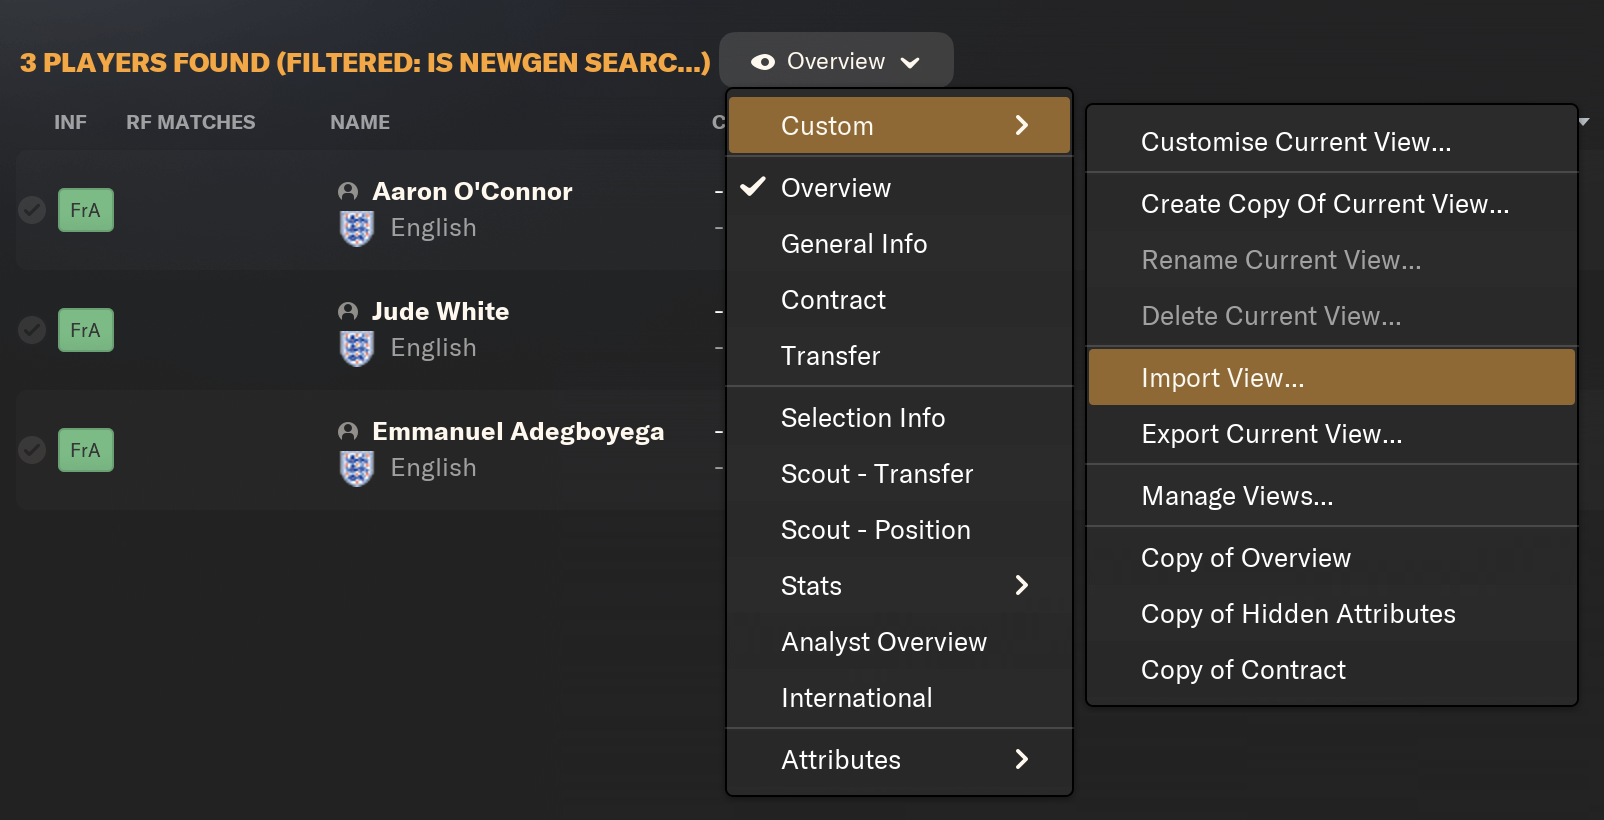
- You should see the views from the views folder that you moved in the last step. If you don't you did something wrong there.

- Now click “SCRIPT FACES player search” and then click “Load”
- Now the player search results will look a little weird. That's fine, it's actually meant to look like that, ignore it.

- Now click on one of the players in the list and click Ctrl + A (windows) or Cmd + A (mac) it may hang for a minute or two if you have thousands of players. DO NOT get impatient and click anywhere else on the page, just wait for it.
- Now click the “FM” Icon and “Print Screen”
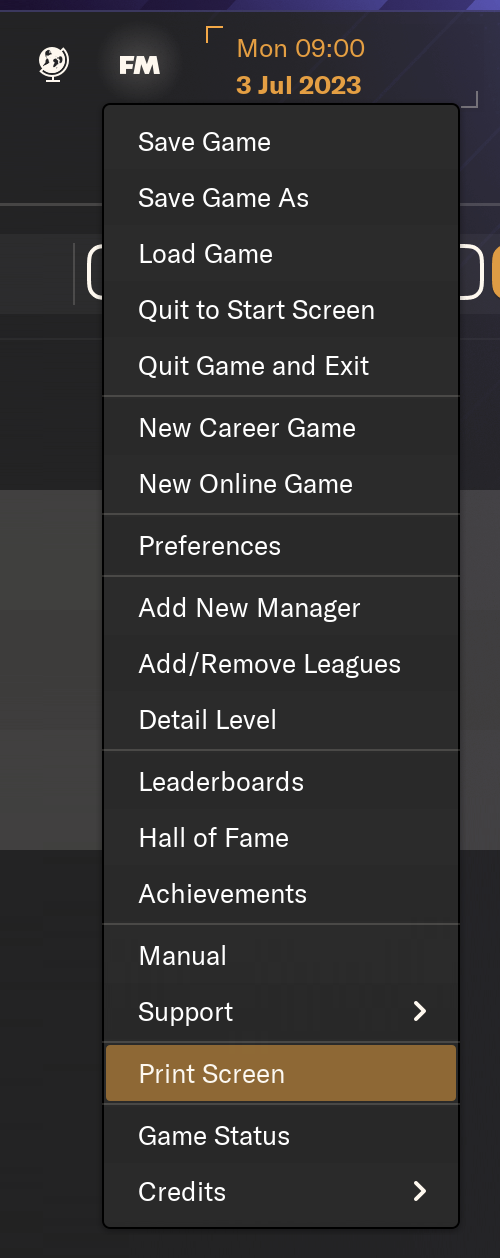
- Then make sure that “Text File” is selected
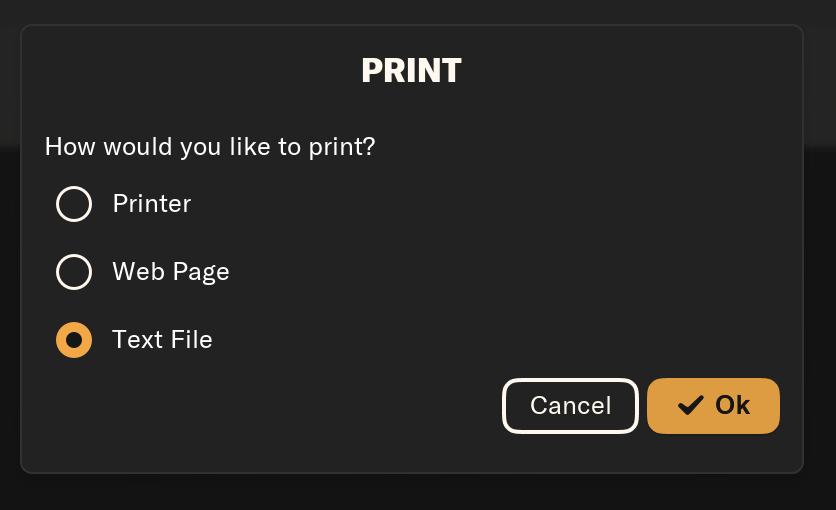
- Click okay and give your file a name such as newganfaces.
- Now remember the place we've been to twice already where we put the faces and the views and filters folders. Go there again and you should see a file called “newganfaces.rtf” or whatever you called it.
Mac: Application Support/Sports Interactive/Football Manager 20XX/newganfaces.rtf
Windows: Documents/Sports Interactive/Football Manager 20XX/newganfaces.rtf
Step 7) Using the NewGan Faces Tool
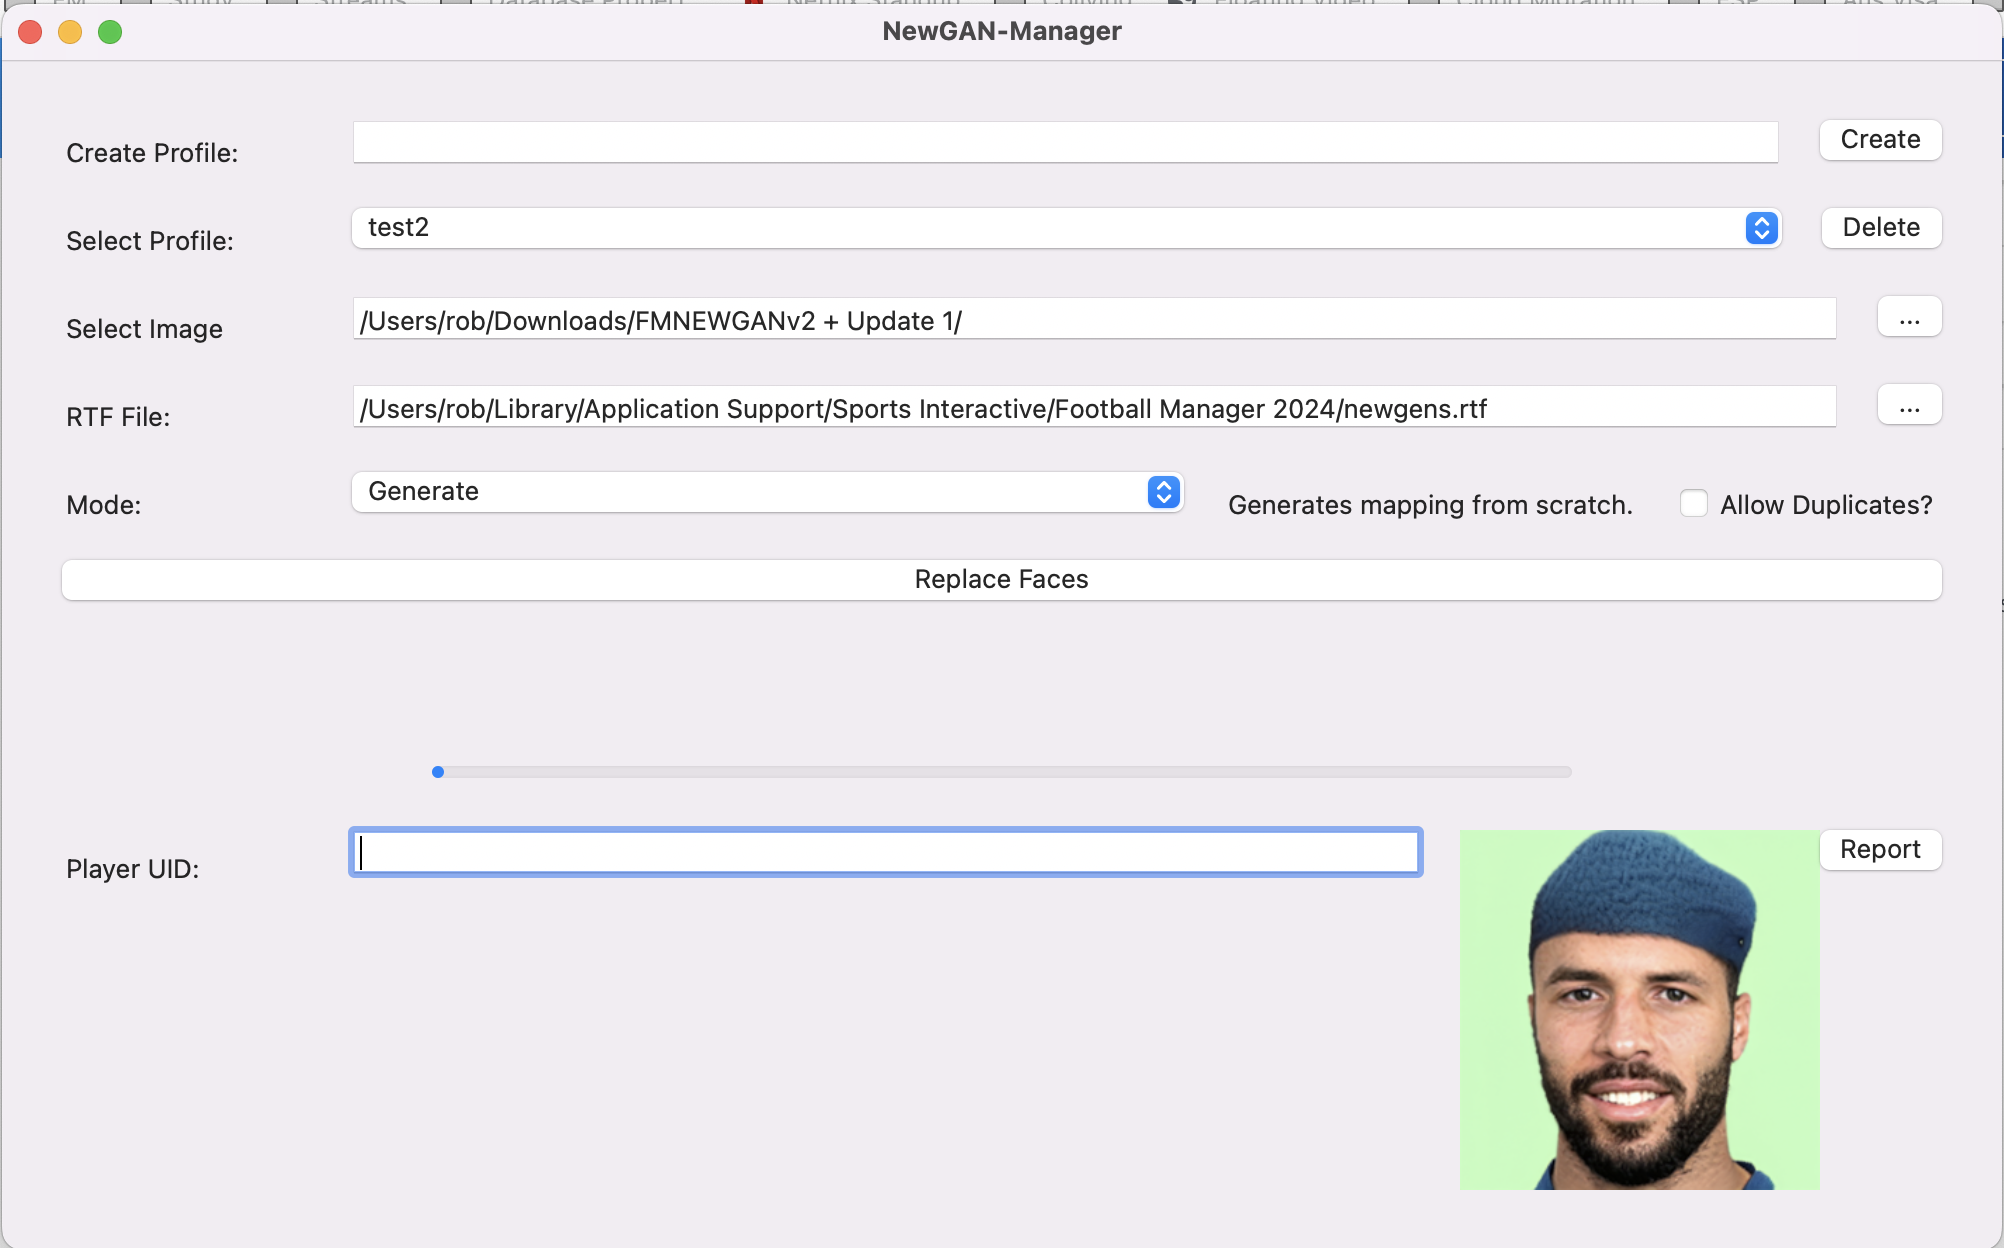
- Where it says “Create Profile” give it a name, something that relates to your save. Then click “Create” then where it says “Select Profile” click the dropdown to select the recently created profile.
- Where it says “Select Image” browse to the folder where we put the newgan faces e.g.
Mac: Application Support/Sports Interactive/Football Manager 20XX/Newgan Faces Megapack/
Windows: Documents/Sports Interactive/Football Manager 20XX/Newgan Faces Megapack/
- Where it says “RTF File” browse to where we saved the RTF file.
Mac: Application Support/Sports Interactive/Football Manager 20XX/newganfaces.rtf
Windows: Documents/Sports Interactive/Football Manager 20XX/newganfaces.rtf
- If you're doing this for the first time make sure that “Mode” is set to “Generate” if not you may want to consider using “Preserve” instead to keep the faces you've set previously.
- Now click “Replace Faces”
- You will see some loading animation and a success message.
- If you want to confirm that it worked. Check for a config.xml in the location you just selected for “Select Image”
Mac: Application Support/Sports Interactive/Football Manager 20XX/Newgan Faces Megapack/
Windows: Documents/Sports Interactive/Football Manager 20XX/Newgan Faces Megapack/
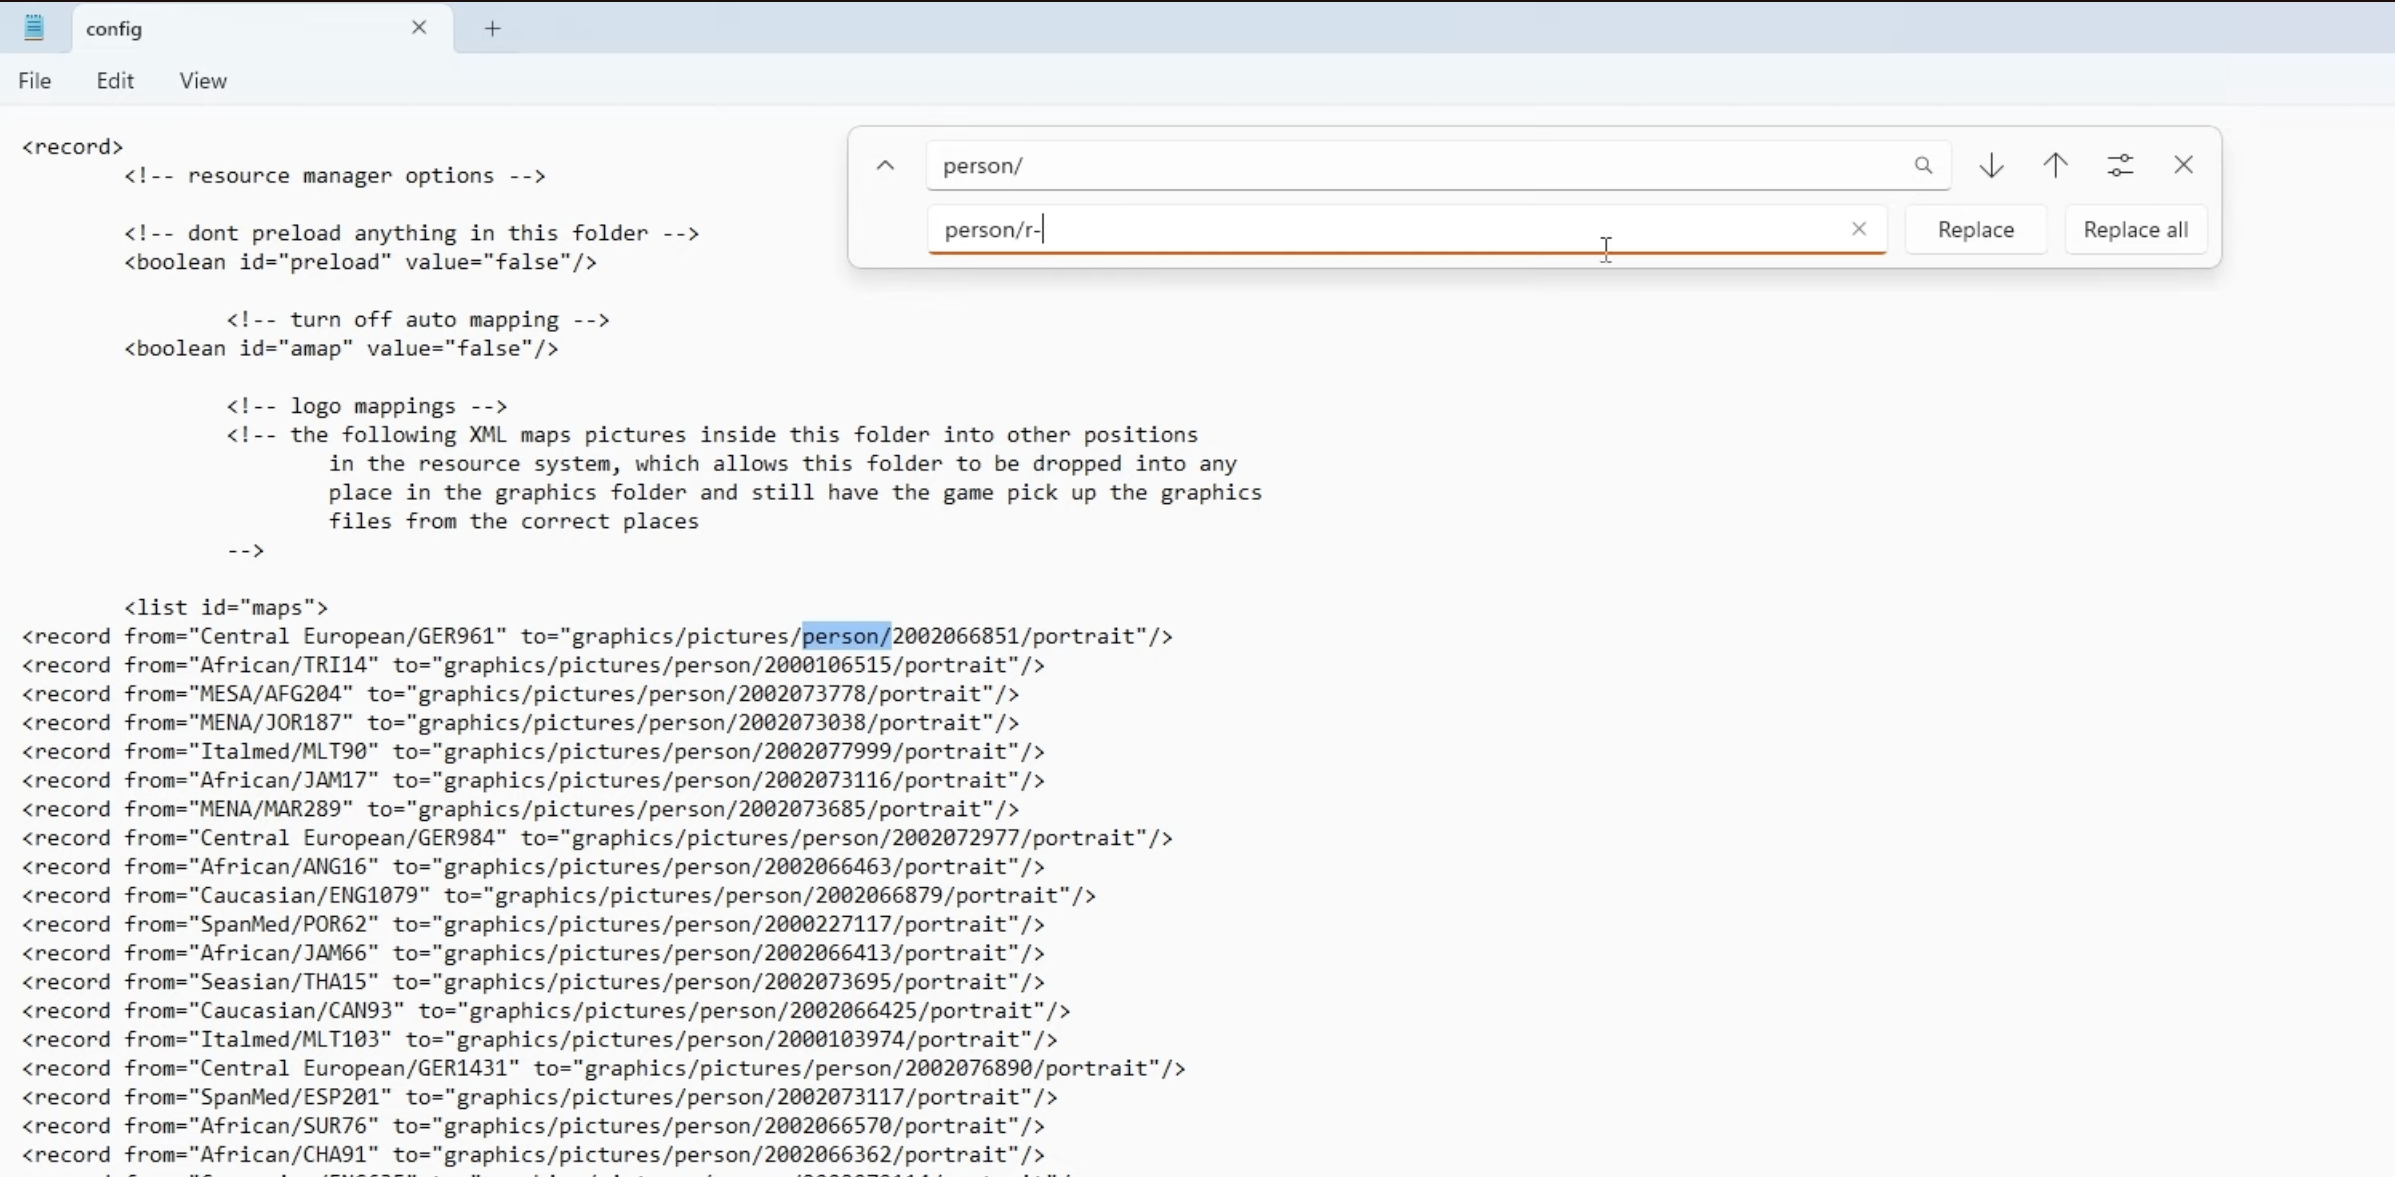
Step 8) FM24 Only: Fixing the config.xml
FM24 changed the way that IDs for newgans are created and they are now prefixed with “r-”.
However the NewGan Manager has not been updated to handle this.
To fix this go to the same path as you selected for “Select Image” in the previous step and open the file called “config.xml” using a text editor such as “Notepad” on Windows or “TextEdit” on Mac. Then use “Find and Replace” and replace all the instances of “person/” with “person/r-”.
You may find the following links helpful for this step.
Windows Notepad find and replace instructions
Mac TextEdit find and replace Instructions
Step 9) Reset your FM Graphics Cache
Now you'll need to reset your Football Manager Graphics Cache to make sure it picks up the new files.
Simply follow these instructions:
a) Open Football Manager
b) Click Preferences on the start screen (or if you're already in a game FM Logo > Preferences)
c) Click the “Advanced” tab
d) On the right hand side select “interface”
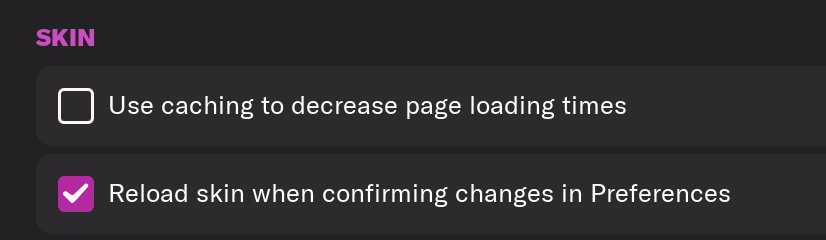
e) Scroll down the Skin Heading
f) Uncheck “Use caching to decrease page loading times”
g) Tick “Reload skin when confirming changes to preferences”
h) Click “Reload Skin”

And now all the faces should be appearing for your newgens
You should go back into the preferences and follow the same steps but this time tick “Use caching to decrease page loading times”, this will help with the long term performance of the game, but needed to be unticked to install these graphics.