
Zerihun Shengeta - Submissions - Cut Out Player Faces Megapack
13204157 Background and Stadium Packs
Submitted
26 Apr 2020 05:45:49
Timeline


This image is a response to
#259079


I need help here
@mons
I'm sure it'll be cut in the near future, just be patient

Have you tried cutting it yourself? Is there something in particular which you had difficulty with?
@mons Yes but with a snow 
@mons Yes but with a snow
What method are you using?
@mons Photoshop CS6
@mons Photoshop CS6
What method of cutting are you using? Refine Edge? Magic Wand? remove.bg?
Because I think that using the tutorial for using remove.bg in the guide to cutting thread as a template would see a perfectly good cut for this source

@mons No, i use magic wand always if i up picture for cut its because never looks good my cut
@mons No, i use magic wand always if i up picture for cut its because never looks good my cut
If you use Magic Wand, it won't look anywhere near as good. Which is why we have a thread dedicated to methods of getting good cuts, as well as text and video tutorials on how to do so.
Have a look at the remove.bg tutorial. I guarantee it won't take you more than 5 minutes to get a good cut for this source using that method. Once you get used to it, you could do it in 2 probably.
Good results, quickly
@mons i check the tutorial much times before, i check it again all perfect
But my CS6 dont remove nothing wiith remove.bg, idk its the CS6 version but the background of the photo remains the same
But my CS6 dont remove nothing wiith remove.bg, idk its the CS6 version but the background of the photo remains the same
@mons i check the tutorial much times before, i check it again all perfect
But my CS6 dont remove nothing wiith remove.bg, idk its the CS6 version but the background of the photo remains the same
I have no idea what you mean, sorry. You must have either have completely misunderstood the instructions or not applied them right.
Did you crop the requested source then put it through remove.bg? It's only then that you use Photoshop not before.
@lorek007, I'm going to post a step-by-step guide to using remove.bg and Photoshop, using this source as an example. I'd appreciate if you would follow this template in any future cuts you may make.
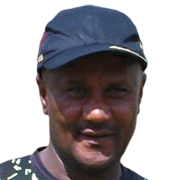
1) You crop the source image to an area around the face (attachment 1). This is important because the preview image produced by remove.bg is reduced in size to around 500x500. Since in our cut-outs we focus on the face, we don't really need anything outside of it.
2) Upload this image to remove.bg.
3) Save this image into your desktop (attachment 2)
4) Open the png file in Photoshop
5) Since the source was not perfectly upright, it's best to rotate it a little bit. You can do this by going Image > Image Rotation > Arbitrary (attachment 3)
6) It will depend on the source image, but in this case 5 degrees clockwise will do. (attachment 4)
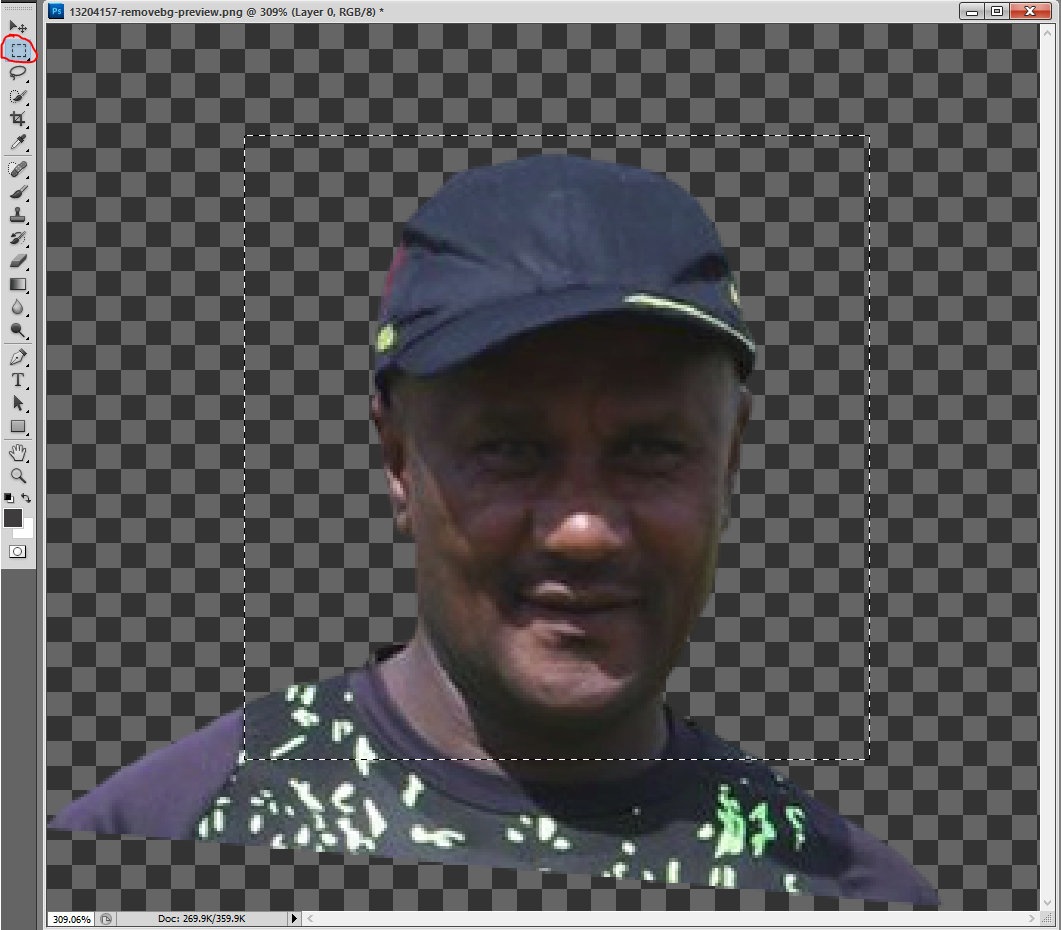
7) Use the zoom tool to fit this cut to the size of your screen (attachment 5). This will help you choose the right dimensions when cropping
8) Crop the cut (attachment 6). Top tip: If you keep the shift button pressed when using the rectangular marquee tool, the area chosen will be a perfect square
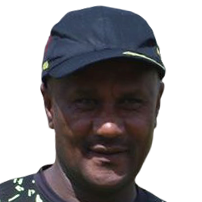
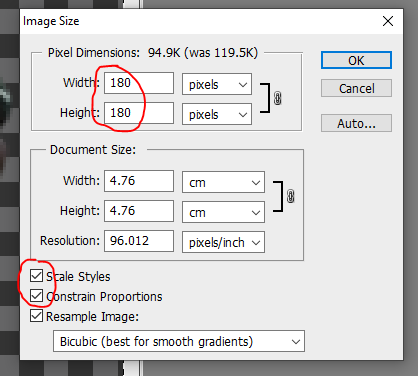
9) In this way, you've gotten the cut in attachment 7. It's 202x202 in size, so it's probably best if you resize it to 180x180, because having it in 250x250 will see it quite blurry. Resize it by going Image > Image Size (attachment 8). Make sure that constrain proportions and scale styles are both ticked so that the aspect ration of the cut is maintained (attachment 9)
10) If you can spot any snow, use this video to remove it. It's really easy to get used to this technique, but you'll need to try it.
11) Cut is now finished and ready to be uploaded
It may look long-winded, but it shouldn't take you more than 2 minutes at the most between downloading the source and having the final cut using this method.
1) You crop the source image to an area around the face (attachment 1). This is important because the preview image produced by remove.bg is reduced in size to around 500x500. Since in our cut-outs we focus on the face, we don't really need anything outside of it.
2) Upload this image to remove.bg.
3) Save this image into your desktop (attachment 2)
4) Open the png file in Photoshop
5) Since the source was not perfectly upright, it's best to rotate it a little bit. You can do this by going Image > Image Rotation > Arbitrary (attachment 3)
6) It will depend on the source image, but in this case 5 degrees clockwise will do. (attachment 4)
7) Use the zoom tool to fit this cut to the size of your screen (attachment 5). This will help you choose the right dimensions when cropping
8) Crop the cut (attachment 6). Top tip: If you keep the shift button pressed when using the rectangular marquee tool, the area chosen will be a perfect square
9) In this way, you've gotten the cut in attachment 7. It's 202x202 in size, so it's probably best if you resize it to 180x180, because having it in 250x250 will see it quite blurry. Resize it by going Image > Image Size (attachment 8). Make sure that constrain proportions and scale styles are both ticked so that the aspect ration of the cut is maintained (attachment 9)
10) If you can spot any snow, use this video to remove it. It's really easy to get used to this technique, but you'll need to try it.
11) Cut is now finished and ready to be uploaded
It may look long-winded, but it shouldn't take you more than 2 minutes at the most between downloading the source and having the final cut using this method.
@mons yeah thanks i try it and now is better
@mons